
History
So I had this Honor 6 H60-L12 which I bought back in 2014, and after a while I’ve decided to give that phone to my mom when I changed to a different phone about a year later. So she was using that phone for another good 2 years when the phone had battery issue. Cause not long after that, she decided to get a new phone instead than replacing the current Honor 6. So after checking around, the cost back then was about RM200 to replace the battery. Then I’ve decided to go online and managed to get a replacement battery that cost only RM80. So after going through some Youtube videos to see how to get the battery replaced, I went and decided to open up the phone and replace it by myself. Long story short, managed to get the battery replaced but then the display wasn’t really showing. I remembered I saw the honor logo before it went all black screen on me. Then I tried plug it in to my computer, it didn’t show anything. So I suspected it could be due to the motherboard, and when I tried to look for it once again online the cost of getting it replaced was about RM500. So since my mom got a new phone, so i decided to shelf this phone back in the box.
Present Day
I was doing a little spring cleaning of my stuff and found this phone again. Thinking that it could still probably worked, I tried plugging it in to the charger. And to my surprise, it charges and I was like thinking maybe I could fix this phone and give it Princess E as a present. So what happened next was that, I connect the phone to my computer after charging it for an hour. It somehow went into fastboot mode, so i thought it could just be a firmware issue. I tried flashing it, but nothing happens. Still blank screen, and pretty much goes into a boot loop I suppose.

So instead of trying to figure out what’s wrong with it, I went and sent it to a 3rd party repair shop at Wisma Saberkas to see if i can get it fixed. The first shop I tried, if i were to get it repair it would be better to get a new phone instead. But if it’s not a motherboard issue, then it won’t be a problem. So after leaving it for a day with them, they concluded that it could be the motherboard problem. And because they didn’t have a board to try it out, they told me that it is best to just leave it. I then brought it to another repair shop, after opening up they said motherboard could be brick. But after pulling out the battery, the repair guy said the flex cable was cut hence no display. I don’t recalled it being cut that way, but he said just to repair the screen alone would cost me RM190. My heart pretty much sank, and I told him that I’ll be aborting that mission to get it fixed.
So after talking to my friend Josh, he too came to a conclusion that i just pass on getting it fixed. Because if I was to replace the LCD, I might need to replace the motherboard if it really doesn’t work. So I tried checking online again to see if I can get the parts, then it would cost me about RM80-RM120. And the replacement board would cost about rm200, hence I decided to just let it go. As we were talking he told me how difficult for him to actually replace his Z5 screen, and then showed me the ifixit link. He then sent me a link on how to actually get it replaced. So I told Josh that if I only get the LCD without the frame, then it would be cheaper for me to get it actually fix on my own. I told him, if I can pry open the phone screen I will go ahead and proceed with the repairs. Should the board has issue,then I’ve already tried my best to get it fix and maybe wait another year or two. Maybe by then the board should be cheap already.

Now that I’ve managed to successfully open up the front LCD, I went and proceeded to order the LCD display. Since I’ve been using the black for a long time, I guess it would be cool to change it to white instead. So now, I’m currently waiting for the seller to send me the parts while I try and download the tools required to unbrick my Honor 6.
Downloading the softwares
Just got an email that my seller is sending out the screen using DHL, so hopefully will get it by the end of this week if not early next week. So after doing some googling, it brought me to this page on how to [Honor6]Honor MultiTool. After running MultiTool, and doing the necessary stuff, looks like I need to wait till I get the LCD first as it requires the 3 button installation to work. So this will be on hold for now.
LCD Came In

So the LCD came on the 14th December, so I quickly went and hook it up. And for the first time in over a year, the Honor Logo finally showed. Boy was it a sight for sore eyes, but then I realized something was wrong with it. It went into a boot loop, as the logo shows up and went black then repeat. It doesn’t boot into recovery, and I was pretty much bummed out. Now I’m wondering did I accidentally bricked the phone during the flashing the firmware a few days ago. I tried using the Honor multi-tools to unbrick it to no avail, and flashing the stock rom nothing seems to work. Head back online to check the price for the motherboard would cost the same of me getting a 2nd hand phone. Told Josh, probably should had stuck with the plan to not get it fixed. Never the less, I could still go into fastboot and flash the phone. Just that I wasn’t sure what was wrong with it, and I was so certain that I could fix the phone if it was just the LCD problem. Plus the phone doesn’t really seem to charge unlike before, which now I suspect could be something wrong with the battery. Bummed out with no option, I was ready to throw in the towel. As I was about to give up, I recalled my wife told me once that “If you knew you could do it, then just get it done.“

Unbrick Honor 6 H60-L12
After numerous hours of searching the web to flash back to EMUI 3.0 or EMUI 3.1 that didn’t helped. Then I recalled, that I never really update the phone. So I went and quickly tried searching the very first firmware that came with the phone which was EMUI 2.3. Here are the following files that got me back up :-
Step 1 – Install ADB Fastboot installer
This is pretty much straight forward, and I got it to install site wide where I will be able to use it anywhere while in command prompt.
Step 2 – Extract EMUI 2.3 Stock Rom
Extract the EMUI 2.3 stock rom to get the dload folder that contains UPDATE.APP file.
Step 3 – Run Huawei Extractor and extract 4 files

So once you run the Huawei Extractor APP you should see something similar as the above image.
- Look for the UPDATE.APP you extracted from Step 2 by clicking on the 2 dots from the image above.
- Press CTRL and click on the 4 files, BOOT.img, CUST.img, RECOVERY.img & SYSTEM.img
- Right Click and select “Extract Selected“
- Select the folder where you would like to extract the files.
Step 4 – Boot your phone into Fastboot Mode
- Power off your phone.
- Press volume down.
- Connect your phone to your computer.
- Wait for a few seconds and it should boot into Fastboot while installing all the necessary drivers (should be no issue if you already installed the ADB installer)
Step 5 – Flash Your Phone

- Go to the folder where you extracted the files from Huawei Extractor
- Hold down SHIFT and right click inside the folder, you should see Open PowerShell window here (Windows 10), or Open Command Window Here (Windows 7/8/8.1)
- In the command prompt type in fastboot devices. This is to check if your device is properly connected to your PC. If it returns you some numbers and devices meaning to say you’re good to go to the next step. If not try disconnecting the phone and reconnecting it back again.
- Type the following command to flash the files to the phone :-
fastboot flash BOOT BOOT.img
fastboot flash CUST CUST.img
fastboot flash RECOVERY RECOVERY.img
fastboot flash SYSTEM SYSTEM.img
For the first 3 files will take a short time, where as for SYSTEM.img will be slightly longer as the file is bigger. - If you didn’t run into any errors especially for the BOOT.img, you should be good to go. Type in the following command to restart the phone :-
fastboot reboot
If done correctly you should now be booting into phone without going through the boot loop. After the Honor Logo, you will see the Android logo followed by going into setting up the phone. Now that I’m able to get into the phone install the apps, make calls and etc, but one problem I faced was that I couldn’t charge the phone. It just won’t detect no matter what I did. I tried doing a factory reset, which also didn’t do anything. Since I’m running on EMUI 2.3, I’m planning to upgrade it to the latest EMUI 3.1 to see if I would be able to get the phone to work. So here are the following steps on how I did that :-
Step 6 – Upgrading from EMUI 2.3 to EMUI 3.0 to finally EMUI 3.1
Now you need the following files to do the upgrade.
Once you downloaded both the files, extract both of them to get the UPDATE.APP. Now do the following :-
- Copy EMUI 3.0 dload folder and place it at the root of your SD Card.
- Power off your phone
- Hold Down Vol Up, Vol Down & Power button at the same time.
- It will boot into recovery mode to update the phone.
- After it updates finish, now copy EMUI 3.1 dload folder and paste into the SD Card to overwrite version 3.0.
- Power off your phone.
- Hold down Vol Up, Vol Down & Power Button at the same time.
- It will boot into recovery to update the phone.
Once it finish updating, the phone will restart and you will be running Lollipop 5.1 on your Honor 6 H60-L12. Now because it doesn’t come with Google Play Store, I’ve zipped up this 4 files for you to install Google Services on your phone. The zip files contains Google Play Store, Google Framework, Google Play Services and Google Contact Sync. To sync your contacts, run the contact app and sign into your Google Account. You should be able to sync all your contacts, then go to the Play Store to get it updated as well as installing the other Google Services on the phone.
After using for a day
Due to the fact that I had the charging issue, I wasn’t able to charge my phone. Anyway, the phone is pretty much dead now after using it for a full day. Cause after I flashed the phone, the battery level was at 50%, tried different chargers, cables and power outlet did nothing. I was able to detect the phone on my computer, but still couldn’t get it to charge. So I suspect there could be problems with the batteries, hence I ended up placing an order for it, and will change it to see how it goes. Hopefully I’ll get the battery within the next 1-2 days. Anyway, I’ll publish this post now, and will update this page again once I receive the battery.
21st December 2018
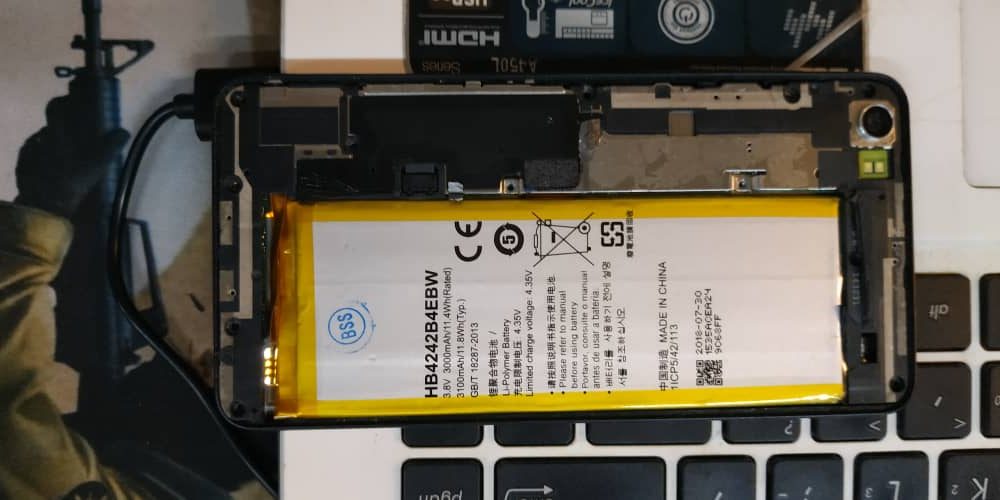
So battery just came in and the first thing I noticed about this battery was that it looked brand new. Unlike the previous one I purchased from another seller years ago. Everything seems to be soldered correctly and there wasn’t any bent marks as compared to the previous battery. So after waiting for 5 days for this to arrive, I quickly went and hook it up to the phone. After powering it up, it was going through the boot animation for some time. I thought most likely, probably it’s the board problem now. While I powered off the phone, I went and screw everything back and decided to call it quits. While screwing halfway, I noticed the phone was starting to feel hot. So when I flipped it over, it actually boot into the system and worked normally. So for the final test, will it charge?

The feeling was ecstatic when I finally managed to get this phone to work with no problem. So far everything seems to be running well and charging steadily as it should. At the time of this updated posting the phone has been charging for close to an hour, and from 45% to 79% which I think is fine. Never the less, someone I know will be very happy with this. But before I hand it over to her most likely in another day or two, I still need to draft out the agreement so that she will not get addicted or miss used it. But so far she has been well disciplined on the Asus phone I gave her just early this year. So I don’t think she will have any issues with this phone as well. So total damage cost? RM90 for the LCD and RM28.25 for the battery total RM118.25, which I thought was quite ok considering that it’s all DIY. Phone should be able to give another good 2 years run with the freshly installed battery.
Anyway, let me know in the comments if you guys are facing any issues. Shout out to Josh for actually inspiring me to get it fixed after showing me the ifixit video. Thanks man, if it wasn’t for you, this phone will still be sitting inside my shelf to rot.
Can the Q50 watch paired with two phones so both father and mum can track the kid ???